
Last updated November 16, 2026
 AC repair
 Furnace & heating
 Heat pumps
 Ductless mini splits
 Carrier
 Trane
 Goodman
Seasonal tune-up and full diagnostic on your Carrier, Trane, or Goodman system - readings shown to you before any repair is proposed
Diagnosis first, numbers second - you approve the repair price before a single part goes in.
Get your free estimateAC Installation Maintenance Checklist for San Mateo Homeowners
The number-one reason a new AC unit underperforms in its first summer in San Mateo usually isn’t a defective unit. It’s a refrigerant charge that was set for inland conditions and never adjusted for the humidity profile of a home near the bay. Manufacturers write most post-installation checklists to cover their own liability. This one is sequenced by what actually fails first in our local conditions, not by what looks good on paper. By the end you’ll know how to verify the commissioning charge, check your condensate drainage, hit the first-year milestones most installers skip, confirm your equipment match, and spot the paperwork red flags that should send you back to your contractor.
Quick Answer
After AC installation in San Mateo, you should verify four things within the first month: the refrigerant charge was adjusted for local humidity and airflow (not left at a factory or inland default), the condensate pan drains with proper slope and shows no standing water, the air handler and outdoor condenser are a confirmed manufacturer match for your duct system, and you received a Manual J load calculation with the commissioning readings. Then run a 30-day, 90-day, and first-full-season check on filters, drainage, and airflow. If any of those four documents or readings is missing, ask for it before the first hot week arrives.
Styles & brands we work with
- AC repair
- Furnace & heating
- Heat pumps
- Ductless mini splits
- Carrier
- Trane
- Goodman
Table of Contents
- Why Most Checklists Miss What Fails First
- Step 1: Verify the Refrigerant Charge for Local Humidity
- Step 2: Check Condensate Drainage, Slope, and the Pan
- Step 3: Confirm the Air Handler and Duct Static Pressure Match
- Step 4: First-Year Maintenance Milestones (30, 90, and Season One)
- Step 5: The Paperwork You Should Receive, and What a Missing Manual J Means
- Step 6: Seasonal Rhythm for San Mateo Homes
- Common Mistakes to Avoid
Why Most Checklists Miss What Fails First
Most AC installation checklists you’ll find online are written by equipment manufacturers. Their job is to document that a unit left the factory within spec and that a contractor followed a warranty-protecting process. That’s useful for a warranty claim. It’s not a ranking of what actually breaks down in the first 24 months in a San Mateo home.
We write this differently because heating and cooling is all we do. Every technician on every call is a heating and cooling specialist by trade, not a generalist rotating through plumbing and electrical work. That narrow focus changes what we watch for after an installation. In our experience, the first-year callbacks we see on new systems in San Mateo cluster into three areas: a refrigerant charge that was never adjusted for the local climate, condensate problems aggravated by the frequency of dehumidification-mode operation, and an air handler that was mismatched to the outdoor condenser for the home’s actual duct static pressure.
Each of those is a commissioning issue, not a manufacturing defect. That means you can catch them early if you know what to ask for and what to look at.
The three failure modes this checklist targets
- Charge drift on a coastal-climate system. A factory charge or an inland-adjusted charge will read “in spec” on a basic gauge check but run inefficiently in a home where the system spends a lot of hours in dehumidification mode.
- Condensate backup. A pan slope that’s “close enough” on a dry day can hold water once a system is pulling moisture out of bay-area air week after week.
- Airflow mismatch. A condenser sized for the home paired to an air handler that doesn’t match the duct system’s static pressure will struggle to move the right cubic feet per minute of air regardless of how good the equipment is.
None of these get caught by a visual walkthrough. All of them should be caught at commissioning, and the checklist below is how you verify that they were. For a broader look at how we handle the install itself, see our AC installation page.
Step 1: Verify the Refrigerant Charge for Local Humidity
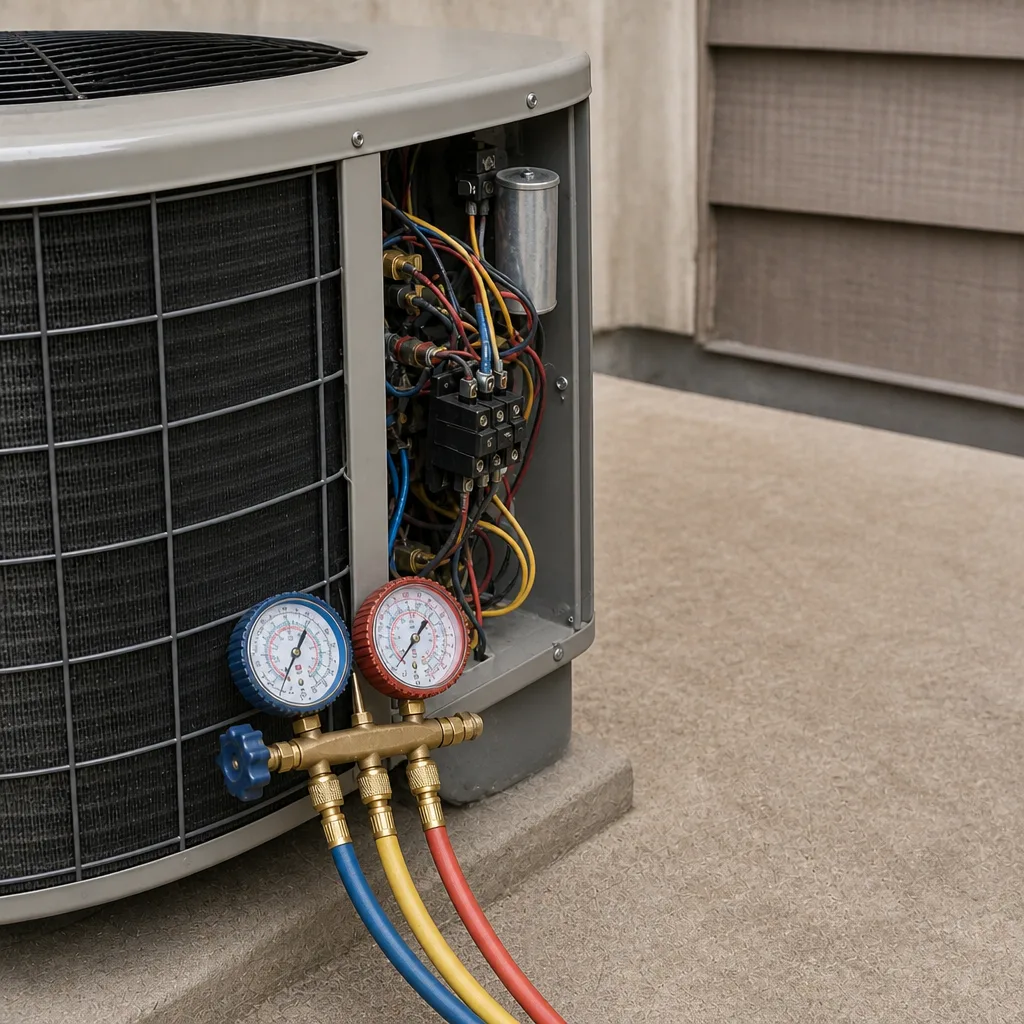
The refrigerant charge on a new AC system should be verified using the subcooling and superheat method, not just a pressure reading, and it should be documented at commissioning with the outdoor temperature and indoor humidity at the time of the reading. That last detail is what most San Mateo installs miss.
Here’s why. A refrigerant charge is set to a target that depends on airflow and the conditions the system is running under. A factory-charged unit arrives set for a nominal condition. A contractor who charges by pressure alone, or who uses a target borrowed from an inland climate where the air is drier and hotter, can leave the system technically “within spec” but running at a subcooling value that isn’t right for a home near the bay. Over a summer, that shows up as a system that cools but never quite keeps up, runs long cycles, and uses more energy than the label suggests.
What to ask for at commissioning
- A subcooling and superheat reading, written down. Not a verbal “it’s charged.” A number on the commissioning report, with the indoor wet-bulb and outdoor dry-bulb temperatures recorded beside it.
- Confirmation that airflow was verified before the charge was adjusted. Charge can’t be set correctly until static pressure and airflow are confirmed. If the contractor charged first and measured airflow later, ask them to re-check.
- Brand-appropriate targets. Some brands, and this includes models from Goodman, Rheem, and Daikin, have manufacturer-specific subcooling targets in the installation manual. The technician should reference the manual for the unit, not a generic chart.
- A repeat reading at the 30-day visit. A charge that was slightly off at install may read differently once the system has run for a month. A 30-day verification catches drift early.
What this looks like in San Mateo
San Mateo homes sit in a climate with mild winters and summers where the AC often runs below full load and cycles more than a system in a hotter inland climate. That cycling pattern makes an overcharge or undercharge more visible than it would be in a place where the AC runs flat-out for hours. If your new unit in San Mateo feels “almost cold enough” in July, a charge verification is the first thing to request, not the last. If your system is already several seasons old and behaving the same way, start with AC repair San Mateo rather than assuming the equipment is failing.
Step 2: Check Condensate Drainage, Slope, and the Pan
Your condensate drain line should slope continuously downward from the drain pan to the drain outlet with no flat sections, and the pan itself should show no standing water after a full cooling cycle. In a climate like San Mateo’s, this matters more than it does in drier parts of the state.
The reason is dehumidification mode. When the air outside is cool and damp, a system spends more of its runtime pulling moisture out of the air rather than running as a pure cooling system. That means the drain line is carrying water more often than it would in a hot, dry climate, and a marginal slope or a shallow trap can back up. A pan that looks dry on a mild afternoon can hold an inch of water by morning.
How to check your own drainage at home
- Locate the drain pan. If you have a horizontal system in the attic or a vertical system in a closet, the pan sits under the evaporator coil. On some installs it’s accessible; on others you’ll need to ask the contractor to show you.
- Run the AC for at least 20 minutes on a warm day. You want a real cooling cycle, not a short test.
- Look for standing water. Any visible pooling in the pan, or a slow drip that doesn’t clear, is a slope or trap problem.
- Check the outside drain termination. Water should be dripping steadily at the outside point while the system runs. No drip during a long cooling cycle, combined with a damp pan, means the line is blocked or the slope is wrong.
- Ask about the safety switch. A float switch in the pan (or in the secondary drain line) shuts the system off if water backs up. Confirm the installer put one in, because standard practice in many homes is a pan switch even where code doesn’t strictly require it.
Where this goes wrong in San Mateo
Older San Mateo homes, especially those with retrofitted central air in closets or attics that were designed for other equipment, are where we see the trickiest condensate layouts. A drain line that exits one side of the pan and then travels across a joist bay can develop a flat spot over a short horizontal run. Ask your installer to walk you through the full drain route and show you where it terminates. If they can’t, that’s a warning sign worth taking seriously.
Foggy mornings and mild daytime temperatures mean San Mateo systems run in dehumidification mode a lot. If your pan has standing water, shut the system off and call for service rather than waiting for the pan to overflow into the ceiling.
Step 3: Confirm the Air Handler and Duct Static Pressure Match
Your air handler should be matched to the outdoor condenser as a manufacturer-approved pairing, and the installer should have measured duct static pressure before finalizing the setup. If either is missing, airflow is running blind and the system won’t hit its rated efficiency.
Air handlers and condensers are matched by the manufacturer into approved combinations. When a contractor pairs a condenser with an air handler that isn’t on the approved match list, or that is on the list but is set to the wrong blower speed for the home’s duct system, the result is a system running outside its rated curve. Some manufacturers, including Rheem and York, publish AHRI match listings that should show up on your paperwork. If you can’t find your model pairing on that list, ask your installer why.
What to confirm at commissioning
- A published AHRI match number for the outdoor condenser and indoor air handler. It will look like a reference code on the proposal or the commissioning report.
- A measured external static pressure (ESP) reading across the air handler, in inches of water column (in. w.c.). High static pressure means the blower is fighting the duct system. A typical residential system with a reasonable duct design should land well inside the manufacturer’s rated range; if the reading is high, the duct system or the blower speed (or both) needs a look.
- A confirmed blower tap setting documented on the report. The air handler’s blower speed taps should be set to move roughly 350 to 450 cubic feet per minute (CFM) per ton of cooling capacity. Small systems and unusual duct layouts may fall outside that range, but the number should be written down and justified.
- A room-by-room airflow check at the registers. Every supply register should have measurable airflow. A room that reads very weak is usually a duct issue, not an equipment issue, but it should be identified before install is signed off.
Why this step matters more than the equipment choice
Brand-agnostic service means we can recommend equipment that fits your home and budget rather than fitting a dealership agreement. But no brand can compensate for a mismatched air handler or a duct system that isn’t measured. Whether your system is a Carrier or a Lennox, an American Standard or a Bryant, the match and the static pressure reading matter more than the nameplate. If you’re also replacing a furnace in a coordinated upgrade, matching both sides of the system at once is one of the reasons we handle furnace repair alongside AC work under one roof.
Step 4: First-Year Maintenance Milestones (30, 90, and Season One)
You should schedule a 30-day check, a 90-day check, and a first-full-season check on any newly installed AC system. Most installers hand you a manual and disappear after the invoice. The first-year timeline is where a genuinely good install reveals itself.
These three milestones aren’t arbitrary. They line up with what actually shifts in a new system over its first months of operation. Here’s what each one should cover.
The 30-day milestone
- Repeat refrigerant charge reading using the same subcooling and superheat method, with conditions recorded.
- Filter inspection. Some dust from the install process finds its way into the return airstream in the first month. Check and replace if needed.
- Condensate pan and drain line inspection after at least a full week of regular operation.
- Confirm no unusual noise or vibration. A short-cycle on start, a rattle in the condenser fan housing, or a gurgling drain line are all worth catching at 30 days.
The 90-day milestone
- Full subcooling and superheat check again, especially if a season has changed over.
- Coil cleanliness check. Outdoor coil should still be clean. If it’s already dirty, something nearby (dryer vents, landscaping, a dusty attic) is feeding it.
- Condensate pan re-check and safety-switch test.
- Airflow verification at the registers, comparing to your install readings.
The first-full-season milestone
- Complete system performance review including temperature split across the evaporator coil (the difference between return and supply air temperature, typically in the range of 15 to 20 degrees Fahrenheit on a properly charged system).
- Duct static pressure re-measurement to confirm the ductwork hasn’t shifted or become restricted by new furniture, a new attic access, or filter changes.
- Written report of what was found. Ask for it in writing. Our technicians aren’t paid on what they sell, so a report that says “everything is within spec” is a legitimate outcome.
Step 5: The Paperwork You Should Receive, and What a Missing Manual J Means
You should receive a Manual J load calculation report, a manufacturer equipment match number, and a commissioning report with recorded refrigerant and airflow readings before the first full season. A missing Manual J calculation report is a red flag worth acting on immediately.
Manual J is the industry-standard room-by-room load calculation that establishes how much cooling a given home actually needs. It accounts for window size and orientation, insulation, duct location, internal heat gain from appliances and occupants, and local climate. Without it, an installer is sizing by rules of thumb. Rules of thumb can be off by a ton or more on some San Mateo homes, especially older houses with additions, upgraded windows, or additions done in different decades.
The documents you should walk away with
- Manual J load report. A room-by-room cooling load calculation, not a summary sheet with a single number.
- AHRI match number. Ties your outdoor condenser to your indoor air handler in a manufacturer-approved pairing.
- Commissioning report. Recorded subcooling, superheat, static pressure, and blower speed settings, with the outdoor temperature and indoor humidity at the time of readings.
- Equipment serial and model numbers. So you can register the warranty and verify what was actually installed matches what was proposed.
- Manual D (if ductwork was modified) and Manual S (equipment selection). These are less commonly requested but a specialist should have them if ductwork was touched.
- Warranty registration confirmation. Manufacturer warranties are often shorter if the equipment isn’t registered, so confirm registration was handled.
Why a missing Manual J is a red flag
If a contractor won’t produce a Manual J report, the most likely explanations are that they sized by rules of thumb or that the report exists but doesn’t match the equipment installed. Either one is worth stopping to ask about before the first summer. An oversized system cools quickly but leaves the home humid and cycles too frequently. An undersized system runs constantly and never quite keeps up. Getting it right starts with the calculation. You can learn more about how we handle the sizing and installation step on our San Mateo page for San Mateo homeowners.
Step 6: Seasonal Rhythm for San Mateo Homes
San Mateo’s mild winter means a properly installed AC system needs less seasonal care than in an extreme climate, but the two-transition rhythm still matters. The two transition points are usually late spring (before cooling season) and late fall (after cooling season).
These aren’t the only times you should check on the system, but they’re the two points where a check catches the most trouble for the least intervention. Here’s what each one should cover.
Before cooling season (late spring)
- Replace the filter and note the size for future replacements.
- Clear the outdoor unit of leaves, debris, and anything stacked against it. Two feet of clearance in all directions is a reasonable rule.
- Inspect the condensate pan and drain line after the off-season.
- Run a cooling test on a warm afternoon and measure the temperature split at the supply and return.
- Check the thermostat: batteries, programming, and setpoint behavior.
After cooling season (late fall)
- Clean or replace the filter one more time going into the off-season.
- Inspect outdoor coil for debris accumulation.
- Check condensate pan one last time before cold weather, and confirm the float switch still trips when it should.
- Confirm no standing water in the pan going into the wet months.
If you’re also running heat during the winter months, this is the moment to check the heating side of your system as well. For homes with gas furnaces in San Mateo, the pre-winter check on the heating side belongs on this same calendar, and our furnace repair team handles that half of the job so you’re not calling two different contractors.
A note on the two-sided view
San Mateo homes don’t always match the seasonal pattern of hotter or colder parts of California. Because we work on both sides of home comfort (AC installation on one side, furnace repair and replacement on the other), we can size and coordinate both at once. A coordinated upgrade matching equipment on both sides to the same Manual J calculation gets you a better match than replacing them years apart. If you’re running an aging furnace and an AC system from the same era, it’s worth asking about a coordinated match before the AC fails on a hot afternoon and the choice is made under pressure.
Common Mistakes to Avoid
- Treating “it’s cold” as proof the charge is right. A system can produce cold air while running at the wrong subcooling value. Insist on documented readings, not a feel test.
- Skipping the 30-day charge re-check. Charge that reads fine at install can drift once the system runs for a month. Most installers never schedule this visit.
- Ignoring the condensate safety switch. A float switch costs little and prevents a pan overflow that can be expensive to repair. If your install doesn’t have one, ask for it.
- Accepting a proposal with no Manual J attached. A proposal that lists equipment and a price with no load calculation behind it is sized on rules of thumb. Ask for the report before you sign.
- Assuming the air handler is matched because the contract says “matching system.” Look for the AHRI match number on the paperwork. “Matching” in a proposal is not the same as a documented match.
- Blocking the outdoor unit with landscaping or storage. A unit packed against a fence or hidden behind a screen in a San Mateo yard still needs clearance on all sides. Restricted airflow on a new unit is a self-inflicted efficiency loss.
- Never looking at the pan after install. Standing water in the pan is the cheapest early warning you can get. Check it once at 30 days and once at 90.
See the difference
 Before
 After
 Before
 After
 Before
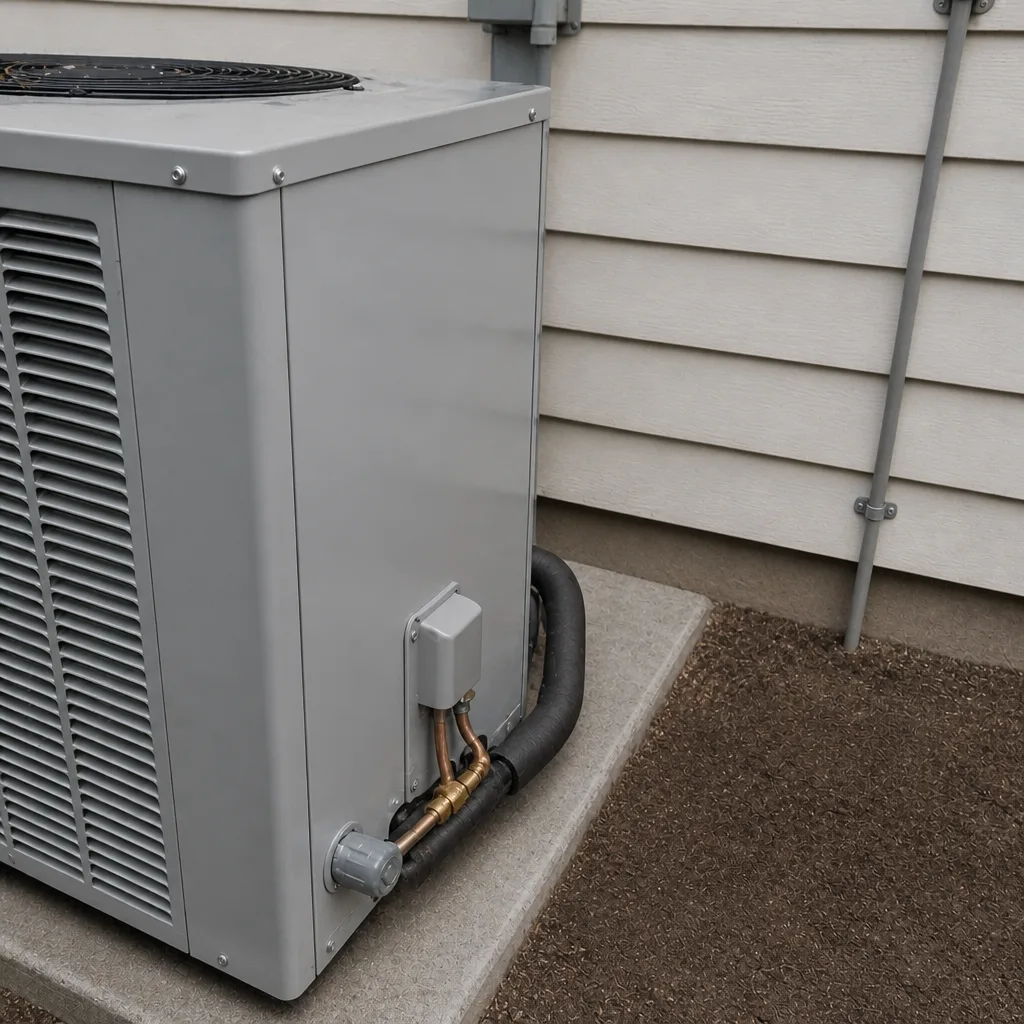 After
When to Call a Professional
Call for service when any of these is true: your condensate pan has standing water you can see, the drain line isn’t dripping during a long cooling cycle, the temperature split across your supply and return is under 15 degrees Fahrenheit on a warm afternoon, the system runs constantly without reaching setpoint, or you can hear the outdoor fan struggling or rattling. Call before the problem compounds, not after. A system with an early condensate or charge issue is far cheaper to correct at 30 days than after a summer of running outside spec.
Refrigerant lines, electrical connections inside the air handler and condenser, and any component that requires opening the refrigerant circuit are not homeowner repairs. Refrigerant under pressure can cause frostbite, and air handler electrical components carry high voltage. Leave those alone and bring in a trained technician.
AC Repair San Mateo offers free estimates in San Mateo – call (866) 260-3183. We work on the brand you already have, not just the ones we sell, and every call is handled by a heating and cooling specialist. Fast dispatch from 7am to 7pm, Sunday through Friday. We answer 24/7.
Frequently Asked Questions
The single most important check is a documented refrigerant charge using subcooling and superheat, adjusted for local conditions at commissioning. A charge that was set for inland conditions or left at a factory default can leave a San Mateo system running outside spec even when it feels cool. Ask your installer to write the subcooling and superheat numbers, the outdoor temperature, and the indoor humidity on the commissioning report. If they can’t or won’t, call (866) 260-3183 for an independent verification – estimates are free.
You should have the first-year milestones at 30 days, 90 days, and the first full season, then a check before and after each cooling season in subsequent years. The 30-day and 90-day visits catch commissioning issues before they turn into warranty calls. After the first year, the schedule tightens to two visits a year for most San Mateo homes. Call (866) 260-3183 to schedule a first-year check.
A commissioning report should include recorded subcooling and superheat readings, external static pressure across the air handler, the blower speed tap setting, the outdoor dry-bulb temperature and indoor wet-bulb at the time of each reading, and the AHRI equipment match number. Without those five items it’s not a commissioning report, it’s a receipt. If yours is missing any of them, ask your installer to complete the report before the first hot week.
The Manual J load calculation determines how much cooling your home actually needs, room by room. Without it, installers size by rules of thumb, which can be off by a full ton on some San Mateo homes, especially those with additions or upgraded windows. An oversized system runs short cycles and leaves the house humid; an undersized one runs constantly. A missing Manual J report is worth acting on before you sign, and it’s worth calling for a second opinion if you’ve already signed. Call (866) 260-3183 for a free estimate.
We’re certified to install and service nine major HVAC brands: Carrier, Trane, Lennox, Goodman, Rheem, York, Daikin, Bryant, and American Standard. That matters on the maintenance side because it means the technician diagnosing your system isn’t limited to the one brand a dealership sells. We work on the brand you already have, not just the ones we sell. Call (866) 260-3183 for a free estimate.
A filled condensate pan can overflow into the surrounding structure, and in attic or closet installs, that means water in the ceiling, insulation, or drywall. That’s why the 30-day and 90-day pan checks matter, and why a float switch belongs in every install. If you see standing water in the pan, shut the system off and call for service rather than waiting. Call (866) 260-3183 – we answer 24/7 and can schedule a fast dispatch.
The Bottom Line
A well-installed AC in San Mateo isn’t verified by the invoice. It’s verified by a documented refrigerant charge adjusted for local humidity, a condensate system that stays dry, an air handler matched to the outdoor condenser for your duct’s static pressure, and paperwork that includes a Manual J calculation and a full commissioning report. Hit the 30-day, 90-day, and first-season milestones, do the two seasonal checks each year after, and you’ll catch the problems most homeowners miss for a full summer. Heating and cooling is all we do, so we do it right. For help with your installation or a first-year verification, call (866) 260-3183 for a free estimate.
Written by the team at AC Repair San Mateo.